
A lifting label edge, clear airflow and the cooled underside
A lifting label edge, clear airflow and the cooled underside.
A
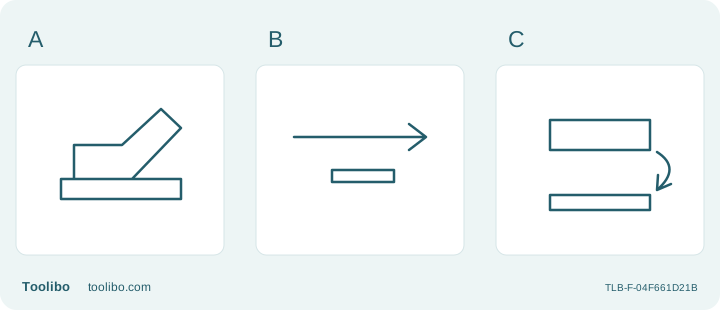
Lift an approved label edge without crossing the hot stream.
B
Keep airflow moving beyond the supported target.
C
Inspect the cooled base and residue as separate outcomes.
Release the approved label without altering its base, then assess residue separately after cooling.
Decide whether this label belongs in a heat process
An adhesive label can be a suitable heat-gun task only when the label and base suppliers permit that removal method. The Bosch EasyHeat 500 and UniversalHeat 600 manual includes softening adhesive bonds, but that does not identify the glue on an arbitrary secondhand object. Restrict this procedure to a known, detached, non-electrical, nonstructural item with a heat-tolerant uncoated base and an adhesive whose removal instructions allow hot air.
Leave identification, warning and legally required labels in place unless their removal is appropriate and authorized. A neat-looking surface is not worth losing essential product information. If the label identifies the base material, record that information before doing anything else. If the base has a finish, hidden backing or uncertain composition, resolve those questions or choose another approved removal method.
Separate label release from residue cleanup
Define two outcomes before switching on the tool. The first is releasing the label without altering the base. The second is dealing with any adhesive left behind. They do not necessarily use the same method, and a successful first step does not authorize continued heating for the second. Ask whether the supplier expects the adhesive to lift with the label or specifies a separate cleanup process.
This distinction prevents a common escalation: the label comes off, a thin smear remains, and the operator keeps increasing heat until the surface changes. Residue that does not release within the permitted process is a reason to stop and reassess. Do not introduce a solvent around a hot tool or use the heat gun to evaporate cleaner. Let the object and tool cool fully before considering any separately approved cleanup method.
Prepare the edge without placing a hand in the air path
Rehearse the removal movement with the tool disconnected and cold. Secure the object without covering the relevant inspection area. Work out where the label edge will move and where the released material will go. Hands should not have to cross in front of the nozzle to catch a curling label or prevent the item from sliding.
Use only a lifting implement approved for the base and process. A hard scraper may scratch an otherwise heat-tolerant surface, so heat resistance alone is not enough to select the implement. Avoid creating a new sharp-edge hazard just to start the peel. If there is no safe way to lift the edge outside the hot-air path, change the setup or use a non-heating method rather than improvising while the gun is running.
Establish the release behavior on a matching sample
Use a spare piece with the same label, adhesive and base when available. A different sticker on the same type of metal is not an equivalent sample. Follow the material supplier’s permitted heating method and the tool’s model-specific instructions, keeping the air moving rather than concentrating indefinitely on a stubborn corner. No universal temperature, distance or dwell time can be inferred from the label’s size.
Observe how the edge behaves during the approved trial. If it separates while the base remains unchanged, continue only within that established process. If it tears repeatedly or the adhesive remains firm, do not assume that more heat is the answer. The adhesive may not be suitable for the method, or the chosen tool may lack an appropriate operating condition. Stop for reassessment if there is smoke, unusual odor or visible material change.
Check the base after it has cooled
Once the label is removed, end heating and let the object cool before judging the result. A warm surface can conceal a temporary softening or make handling unsafe. Inspect the original label boundary and the surrounding area for altered gloss, discoloration, distortion or scratches from the lifting implement. Compare with the unheated sample if one was prepared.
Separate harmless remaining adhesive from damage to the base. A tacky area is not automatically a reason to repeat the hot-air step. Follow the previously selected residue-cleanup plan only when the object is cool and that plan is compatible with the base. If the surface has changed, preserve the failed sample and record what happened rather than trying to conceal the change with further heating.
Keep the result specific to this label and object
Record the label or adhesive identification, base material, tool model and nozzle used. For the German EasyHeat 500 and UniversalHeat 600, also record the selected stage, because the models do not offer the same set of operating choices. Do not describe a result simply as using a Bosch gun on low: that phrase is too vague to repeat reliably.
An accepted trial applies only to the matched construction and permitted process. A replacement sticker, decorative coating or different base thickness can change the decision. For a one-off object with no representative sample, preserving the item through an approved non-heating method may be the better outcome. The goal is controlled adhesive release, not demonstrating that every label can be removed with enough hot air.
Models referenced