
Three distinct configurations
Three panels show dry cartridge, wet foam and the detached blower with adapter and a clear discharge zone.
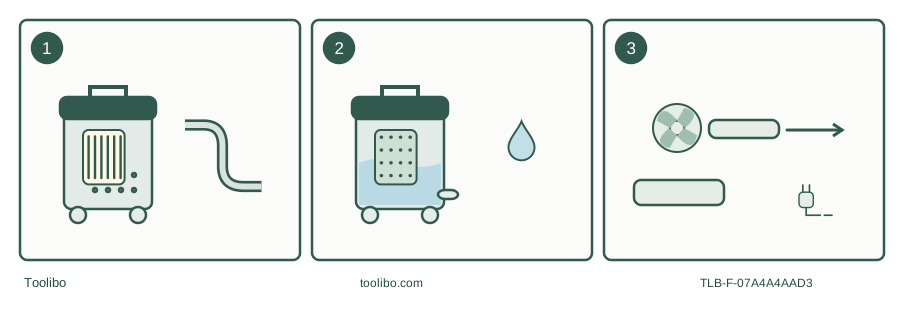
Dry vacuum
Cartridge fitted and retained; verify any optional bag separately.
Wet vacuum
Replace dry cartridge with foam, retain cage and float, and plan drainage.
Detached blower
Unplug, release and configure the blower, then keep the discharge area clear.
Original conceptual states; actual locks and attachment shapes follow the matched manual.
Confirm the detachable-blower model and its manual
Vacmaster VBV1210 is the US 12-gallon wet/dry vacuum with a detachable blower. This guide uses the exact legacy OEM manual marked VBV1210 and VR01BZ.20.60.01. The current product page’s download link leads to a document with a different model on its cover, so that linked file is not used as an operating reference here. Match the supplied manual and nameplate before proceeding.
The current US listing specifies a 2-1/2-inch by 7-foot hose, 15-foot cord and nominal 12-gallon drum. The 5 peak-HP label is a laboratory motor figure, not continuous output. Tank volume is not guaranteed usable liquid capacity. This article does not adopt the listed blower-speed figure as proof of leaf-clearing performance.
Keep three operating states separate
Think of the VBV1210 as having a dry-vacuum state, a wet-vacuum state and a detached-blower state. Switching between them changes more than the nozzle. Keep the dry cartridge, wet foam sleeve and blower adapter identifiable in storage, and inspect what is installed before every task.
For ordinary dry debris, the matched manual requires the cartridge over the cage with its retainer secured. It warns that the standard filter is not suitable for very fine drywall dust or fireplace soot; a separately appropriate fine-dust filter is needed where the material is otherwise permitted. This is not approval for toxic or hazardous dust. Do not infer such approval from a replacement filter’s marketing name.
An optional collection bag, if used, must match the exact machine and be intended for the material. The checked legacy manual’s standard carton list does not establish a supplied dust bag. Do not add an unverified bag part number merely because another 12-gallon Vacmaster uses one.
Make the wet conversion before connecting power
For liquid pickup, switch off, unplug and clean dry dirt out of the tank. The matched manual explicitly replaces the dry cartridge with the supplied foam sleeve; do not leave the cartridge installed under that instruction. Remove any dry-only bag. Keep the cage and float in place and cover the cage correctly with the foam.
For larger quantities, leave an air gap at the nozzle opening rather than submerging it completely. The float eventually interrupts suction, with an increase in motor speed. Stop, unplug and drain into an appropriate receiver. Refit the cap before resuming. The float does not disconnect electricity or authorize unattended operation.
After a wet job, clean and dry the tank and wet filter, then restore the cartridge before dry work. A foam sleeve left installed after yesterday’s water cleanup is not a dry-dust setup. A visible configuration tag can help if several people share the vacuum.
Detach the blower as a deliberate separate operation
The blower is not simply the whole vacuum dragged outside with its hose reversed. With power disconnected, the matched manual removes the noise diffuser, releases the blower’s locking lever and lifts the blower from the lid. The adapter and suitable extension or nozzle then connect to its blowing outlet. Hold the unit securely before switching it on.
Plan where debris will land. Keep bystanders clear and use appropriate eye protection; dust-producing work may also require suitable respiratory protection. Blowing material into a neighbour’s space, a doorway or back toward your clean work area defeats the cleanup. If the material is hazardous or uncertain, do not use blowing as a substitute for controlled collection.
Before returning to vacuum mode, disconnect power again and confirm the blower is correctly seated and secured. Look for debris around the intake and mounting surfaces. Follow the matched manual for the owner-accessible intake maintenance; do not open the motor housing or improvise a replacement protective screen.
Finish all three states with the same checks
Inspect the cord, hose, latches and filters. An attachment that fits loosely, damaged filter media or a missing protective component needs correction before the next use. Store the emptied, dried machine indoors and keep the blower adapter with its own accessories so conversion does not become a search for approximate substitutes.
Do not collect flammable liquids or vapours, explosive dust, hot or smoking materials, or toxic substances. Use a disposal route appropriate to the contents, not whichever drain is nearest. The detachable blower expands the tool’s configuration choices; it does not expand the list of safe substances.
Models referenced