
Holder jaws need their own clearance
Jaws around a screw, a clearance envelope beside a wall, and separately clamped work distinguish holding functions.
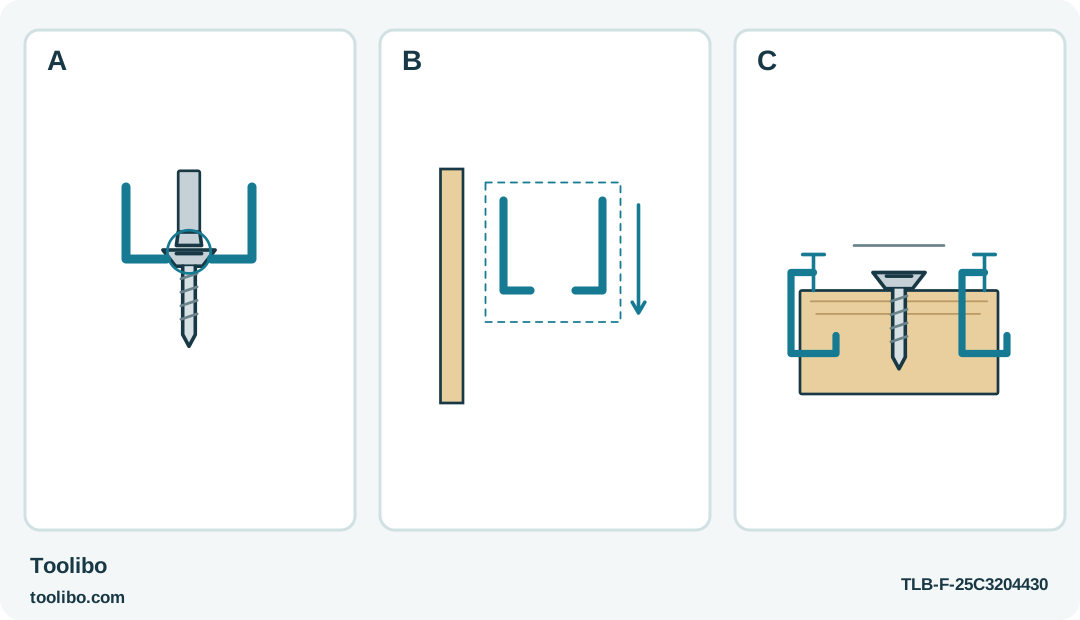
A
The accessory jaws support the loose screw; bit retention is a different function.
B
Check the jaw envelope throughout approach and withdrawal, not only at the starting position.
C
Restrain the work independently. The screw holder cannot clamp a furniture component.
Holding a loose screw does not restrain the workpiece, and the jaws need room even after the screw begins moving.
Give the holder one job
A loose screw is awkward when one hand is occupied positioning a small fitting. The original US WORX WX255L includes a removable screw holder that can support the fastener separately from the selected bit. That convenience does not make the whole operation safe to perform with an unsecured workpiece.
Begin with a stable, visible, non-electrical household assembly. Support or clamp the work by an appropriate method, keeping your free hand away from the driving path. If the fitting falls out of alignment whenever you release it, solve that support problem before putting a screw into the holder.
Choose the exact fastener required by the fitting. A holder can retain the wrong screw just as effectively as the correct one. Check the length, head and intended hole before considering the powered part of the task.
Check the path of the tool and the jaws
Rehearse the approach with the tool off and locked. Look at the space around the screw head, not merely the straight line to its center. The holder’s jaws need room as the fastening progresses; a nearby rim or bracket can obstruct them even when the bit itself has clear access.
Think through the finished position. A screw may begin above a surface but end inside a recess. If the holder will collide with the surrounding material before that endpoint, do not plan to force it through the last part. Use the permitted holder arrangement and another suitable approach for that fitting.
Keep the screw axis, bit axis and intended hole aligned. The holder is not an angle guide. If you have to bend the screw sideways to reach the hole, reposition the work or change the tool rather than expecting the jaws to straighten the fastener during rotation.
Load with the motor prevented from starting
Wait for complete rotation to stop and use the forward/reverse lock position before setting up the holder. Follow the exact illustrated installation and removal method for this WX255L accessory. Do not transfer a method from another WORX body or an aftermarket attachment that only looks similar.
Select the correct cartridge bit first, with the slide operated through its full intended travel. Then fit the fastener to the holder in the documented arrangement and verify that the working tip engages its recess. Keep fingers out of the path where the screw and jaws will move.
A screw that will not sit correctly is a signal to check compatibility and setup. Do not tape it to the holder, wedge the jaws or squeeze them with another tool. The holder should not need an improvised restraint to maintain the intended relationship between bit and fastener.
Start the screw squarely and watch the seating
Position the screw at the prepared location with the work securely supported. Check its alignment before choosing the driving direction. Apply controlled pressure along the screw axis and use the on/off switch only when you are ready for the fastener to move.
Watch both the screw and the holder’s clearance as the head approaches the fitting. Release if the jaws meet an obstruction, the screw leans, the bit slips or the work moves. Do not hold the jaws closed against their intended movement or continue driving merely because the screw has already started.
The final tightening requirement still comes from the furniture or hardware. A holder cannot tell you that a thread is stripped or that a thin bracket has begun to bend. Pause to inspect rather than driving until the motor stalls. Avoid prolonged strained operation at low speed.
Finish with the fitting, not the accessory
After the screw is seated correctly, withdraw the tool without prying the holder against the work. Check the fitting’s normal function and confirm that the surrounding surface has not been damaged. A screw held straight at the start can still be unsuitable if its length or thread was wrong.
Lock the tool before removing the holder or selecting a different bit. Keep the accessory with the exact device and its instructions, and inspect it for damage before the next use. Clean only the accessible exterior as instructed; do not lubricate or dismantle the tool to cure a holder problem.
Use the accessory when it genuinely improves control of a loose fastener. When it reduces visibility or leaves no room for the jaws, leaving it off and choosing another safe method is the more useful feature decision.
Models referenced