
Extra reach still needs a straight screw axis
Three conceptual cabinet sections separate straight shaft reach, clearance around the tool body, and withdrawal along the screw axis.
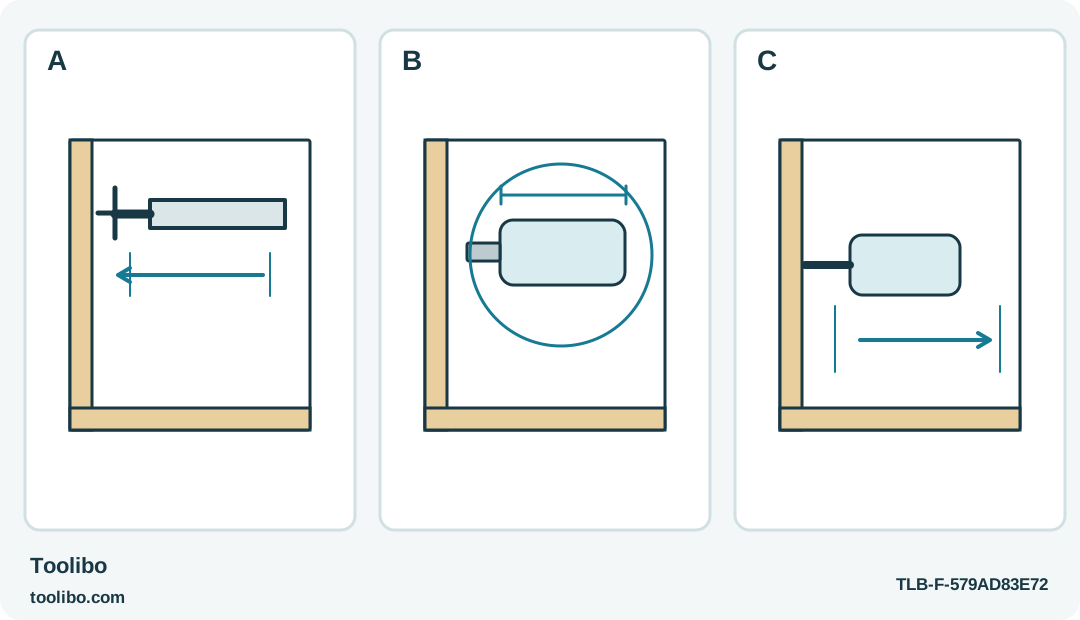
A · Reach
Extra shaft reach follows the same straight line as the screw; it is not an angled transmission.
B · Body clearance
Check the body and gripping-hand space, not just whether the tip reaches the recess.
C · Withdrawal path
Rehearse withdrawal along the same line with the motor stopped before powered work.
Conceptual access check. An extending shaft reaches farther along its axis; it does not authorize sideways loading or improvised adapters.
Check whether reach is really the problem
A recessed screw can tempt you to lean a short driver against the edge of a cabinet. The bit may touch the recess, but the contact is poor and the tool body can scratch the surrounding surface. The WX252L provides extending reach; that helps only when there is still a straight path along the screw’s axis. It does not turn the tool into a right-angle attachment.
Wear suitable eye protection and keep bystanders away before beginning powered fastening. Keep loose clothing, hair and fingers clear of the rotating bit.
Look into the recess with the workpiece supported and the tool stopped. Identify the whole screw head and the surface it secures. If the fastener disappears behind an obstruction, or the job would bring the bit close to concealed wiring, stop and change the access plan. This guide concerns visible furniture fittings, not electrical equipment, wall cavities or load-bearing assemblies.
Distinguish three obstacles. A deep recess needs more reach. A nearby side wall needs clearance around the tool body. A screw pointing away from the available opening needs a different approach altogether. Only the first two may be helped by the WX252L’s shaft and offset layout.
Set up with the trigger protected
Unplug the charging connection and put the forward/reverse control in its lock position. Keep the trigger untouched while changing the bit or shaft position. Use the top slide cover to adjust the extending shaft according to the tool’s illustrated instructions. Check its position before bringing the tool to the work.
Choose a sound bit that fits the screw recess and the tool’s holder. Do not assume any long bit is suitable merely because its shank appears to fit. The bit must be properly retained, and its unsupported length must not create an awkward approach. Avoid stacking improvised adapters to reach a fastener that is otherwise inaccessible.
Before powering anything, place the bit at the screw head. Check clearance at the tool body, the extending section and your gripping hand. If your fingers will be pinched between the handle and the cabinet as the screw moves, the access plan is not ready.
Make a dry approach from two viewpoints
The simplest useful test is to rehearse the movement with the motor stopped. Align the bit with the screw, then withdraw it along the same line. You should be able to do both without scraping the edge of the recess or twisting your wrist into an unstable position.
View the alignment from above and from the side. A driver that looks straight in one view can still be angled in the other. Support or reposition the furniture part if possible; do not try to solve every clearance problem by moving the shaft farther out.
For a loose fitting, place its screw in the intended hole by hand before using power. Keep the fitting flat and make sure no adjacent part is trapped underneath. The extended shaft should help you reach the fastener, not serve as a lever to push the fitting into position.
Drive with an exit route
- Set the required direction while the motor is fully stopped. Check the control position before seating the bit.
- Hold the tool securely, engage the recess fully and begin with a short controlled drive.
- Release the trigger and inspect the fitting before the head reaches its final seat. Confirm that the tool has not drifted sideways against the recess.
- Continue only while you can maintain the same straight line and see the result. Stop at the seating condition required by the furniture instructions.
- Release the trigger, allow rotation to stop, then withdraw the bit without levering against the screw head.
When removing a screw, plan for the fastener and fitting to become loose. Support the part beforehand and use a container so the screw cannot fall into a difficult cavity. Stop before an awkward last turn and complete the removal by hand if that gives better control.
Do not change direction while the shaft is turning. If the bit slips, stop instead of pressing harder while it skates over the recess. A damaged screw head or bit is a reason to reassess the job, not to extend the shaft again.
Know when the extension is not enough
The powered driver is the wrong choice if you cannot keep the shaft straight, cannot see the screw seating or cannot withdraw the tool safely. A suitable hand screwdriver or partial disassembly of an ordinary furniture component, where its maker permits it, may provide better access. Do not bend accessories or use the shaft as a pry bar.
If the motor struggles, release the trigger and inspect the fastener. Repeated low-speed loading is not a careful way to overcome a jam. Exclude rusted, seized or damaged screws from this routine and seek an appropriate repair method.
After the job, lock the control and return the tool to storage only when it is cool and clean. Use a dry cloth externally; the tool does not call for added lubrication or owner servicing inside its housing. The successful result is an undamaged, correctly secured fitting, not simply proof that an extended bit could touch the screw.
Models referenced