
Inspect both sides of a loose handle
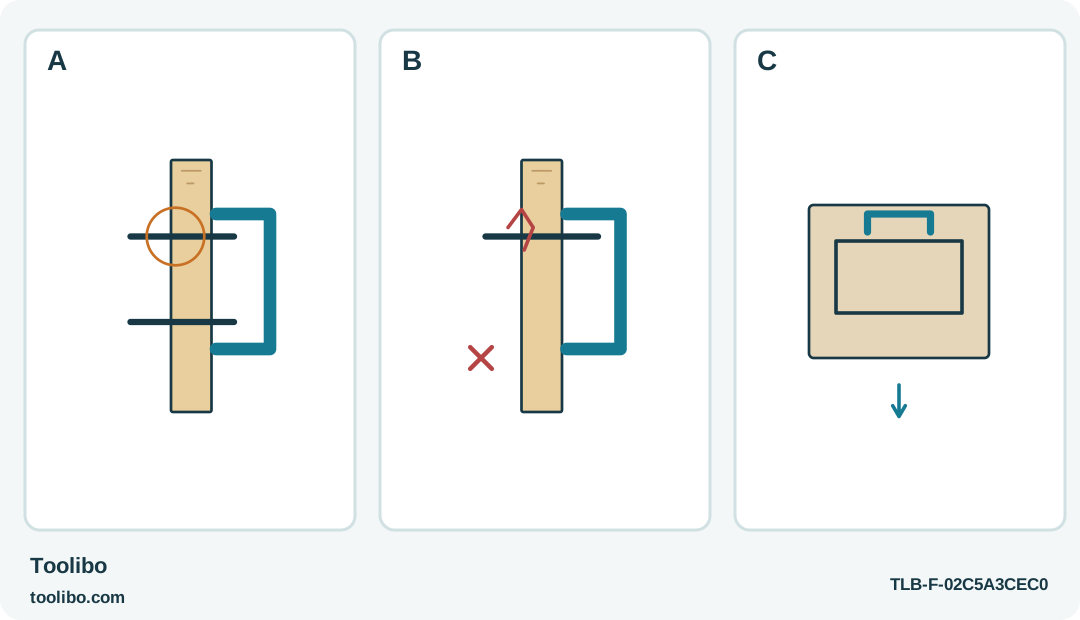
A handle fixing seen in section, damage near its panel hole and a gentle drawer-motion check connect inspection to normal function.
A
Inspect screw, washer, panel and handle thread before deciding whether any powered adjustment is appropriate.
B
A cracked panel, damaged thread or bottomed screw is a repair question; do not substitute extra length or force.
C
After the maker’s prescribed fastening, check normal gentle drawer operation and inspect both faces, not a forceful pull test.
Seeing both sides helps distinguish a loose fastening from a cracked panel or damaged thread before deciding whether tightening is appropriate.
Empty and support the drawer first
A handle that moves when pulled does not necessarily need a harder turn of its screw. The screw may be loose, the handle thread may be damaged, the hardware may be wrong or the panel may already be crushed. Begin by emptying the drawer and supporting it in a position where both sides of the handle fixing can be inspected.
Use the drawer or furniture maker’s instructions for access and fastening. This guide is for an ordinary non-load-bearing drawer handle, not a grab rail, a lifting handle or a child-safety assembly. If the drawer cannot be removed or supported safely, improve access before bringing a powered driver to the inside face.
Identify the fastener before moving it
Look at the screw head, washer or backing plate, the panel and the handle connection. Confirm the original screw type and length rather than substituting one from a mixed container. A screw that reaches the end of a blind handle thread can feel tight while leaving the handle loose; a screw that is too short may not engage as intended.
Check for a cracked panel, an enlarged hole, missing hardware or damaged handle threads. If any of those is present, stop the tightening attempt and obtain the furniture maker’s repair method. Do not add a longer screw, extra force or adhesive simply to make the movement disappear. The visible symptom does not identify which replacement part is needed.
Set up the driver without touching the finish
The BLACK+DECKER BDCS20 and SKIL SD561802 can be considered only where their intended screwdriving use and the furniture instructions permit a powered step. Start with their controls stopped and center-locked, and disconnect charging equipment. Fit the correct bit for the actual recess, not just a tip that appears to catch its edges.
The BDCS20 excludes double-ended bits. The SD561802 has its own magnetic holder and pivoting handle; if a different grip position is needed, change it while stopped and confirm it locks. Keep the bit aligned with the screw. Neither a pivot nor a short body justifies leaning the bit against the inside face of the drawer.
Decide whether power adds anything useful
For a screw that needs only a small final adjustment, a correctly fitting hand screwdriver may give the clearest control and may be the method required by the furniture maker. Do not use power merely because the driver is already in your hand. First support the handle from a safe position so it cannot twist or fall as the screw is adjusted.
If the permitted task includes powered travel, wear eye protection, keep fingers away from the rotating tip and make only a short controlled movement. Release the trigger before the final seat and inspect the handle and panel. Stop immediately if the screw spins without tightening, binds unexpectedly or begins to crush the surface. Repeated short bursts are still repeated loading of a faulty joint.
Check function without turning the handle into a test rig
After the specified fastening is complete, check that the handle sits evenly and the drawer opens and closes normally. Use ordinary gentle operation, not a forceful pull intended to prove its strength. A satisfactory feel does not certify a damaged panel or an improvised replacement screw.
Look again at the inside face for a lifted washer, fresh indentation or movement of the screw head. If the handle loosens again during normal use, end the cycle of repeated tightening. Record the hardware and symptom for the furniture supplier so the underlying fit or damaged part can be addressed.
Leave the next adjustment easier to understand
Keep any confirmed spare hardware labeled with the drawer or cabinet details. Photograph the correct assembly if that will help you recognize it later, but do not use a photograph as a substitute for the required fastening instructions. Remove loose tools from the drawer before returning its contents.
Lock and store the driver after the job, with the bit and charger identified. The useful result is a sound handle assembly that works normally within the furniture maker’s method. If inspection instead reveals a damaged hole or mismatched screw, discovering that before further tightening is a successful outcome too.
Models referenced