
Illuminate the joint before activating the bit
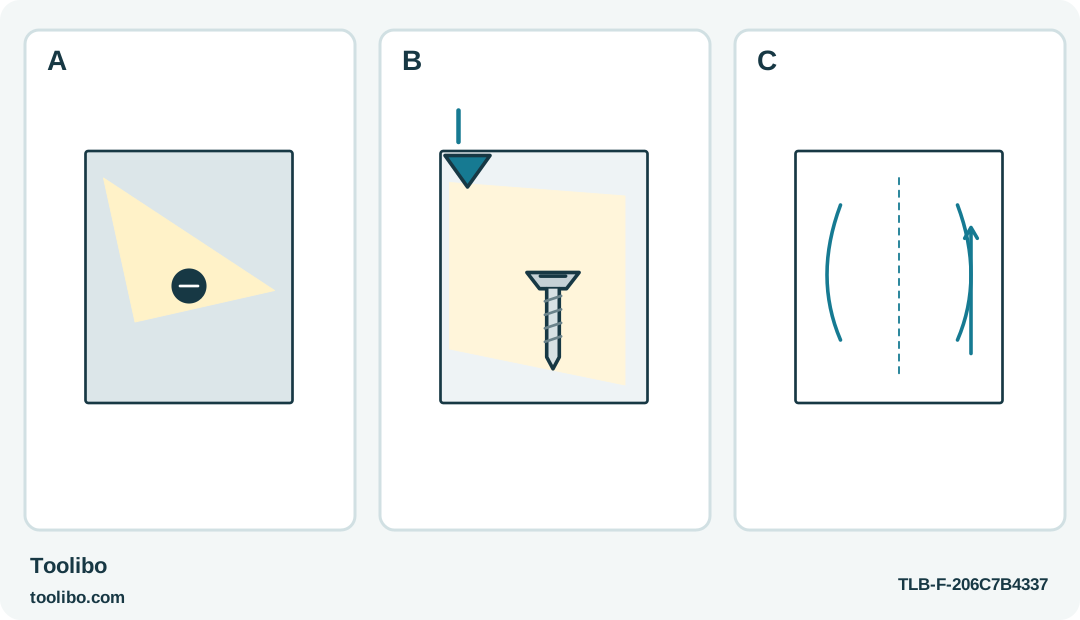
A narrow bright spot surrounded by shadow, a wider independent light field and a clear hand-and-axis path explain useful illumination.
A
A bright spot can leave the fitting and hand path in shadow; it does not establish straight access.
B
Provide stable separate task light for stopped-tool alignment. Do not run the SKIL bit merely to obtain trigger-operated light.
C
Rehearse alignment, control release and withdrawal with the whole path visible, then inspect under ordinary light.
A narrow bright spot can leave important edges in shadow; separate task lighting should reveal the entire stopped-tool approach.
Illuminate the whole fastening problem
A driver’s worklight can make a screw head bright while leaving the surrounding bracket, your hand and the screw’s seating surface in shadow. That narrow pool of light is useful, but it is not the whole view needed for controlled fastening. Before bringing the tool into a cabinet, arrange enough room and task lighting to see the fitting and the path your hand will take.
This guide concerns the SKIL SD561802 and Panasonic EY7410 on visible, ordinary household fasteners. It does not authorize probing a wall cavity, searching for concealed wiring or using the tool as an electrical tester. If you cannot identify what the screw secures and where it enters, better lighting is only the beginning of resolving the job.
Check the view with the motor disabled
Support or reposition the furniture component as its instructions permit. With the driver stopped and locked, approach the screw using the correct bit. Look from above and from the side to confirm alignment. A bright recess can still be approached at an angle, particularly when the tool body hides the line of the shaft.
Check the clearance for the gripping hand and for withdrawing the bit after the screw moves. Do not put a face close to the rotating area to compensate for a poor view. If a fixed obstruction prevents a straight approach, choose a different permitted access method or a suitable hand screwdriver rather than relying on the light to guide an angled bit.
Learn how the particular light is operated
On the SD561802, the worklight illuminates with the trigger and turns off after the trigger is released. Do not use the rotating bit to search for the recess simply to obtain light. Provide separate task illumination while aligning the stopped tool, then use the worklight as additional light during the permitted fastening.
The EY7410 has its own light-button sequence, including the specified preparation involving its power switch. Perform any such preparation with the tool clear of the work and people, following the exact instructions. Do not assume the SKIL trigger behavior describes the Panasonic, or that either built-in light is intended to replace general workplace lighting. Avoid looking directly into an LED.
Remove shadows without sacrificing restraint
Move a suitable task light or reposition the supported work before releasing a clamp or leaning the driver. A hand-held torch in the same free hand that is needed for safe support may make the setup less controlled. Prefer a stable lighting arrangement that stays out of the bit path and cannot be knocked into the work.
Look for glare from a shiny bracket or a pale screw head. If glare hides the recess or seating surface, change the light angle while the tool is stopped. Do not keep rotating the bit against the screw to find the correct position by sound. The fitting should be visible before the motor supplies movement.
Drive only while the result remains visible
Wear eye protection, engage the correct bit fully and keep the work restrained. Use a cautious fastening sequence appropriate to the exact tool and joint. On the Panasonic, keep gear and clutch conditions within its instructions; the light does not make a high setting or a protection stop harmless.
Release the control and inspect before the head reaches its final seat. If the tool or your hand blocks the view as the screw advances, stop and change the access plan. Do not finish the last turns blindly because the earlier turns went well. Stop on slipping, unexpected resistance or movement of the workpiece, then isolate the tool before adjusting anything.
Inspect again under ordinary light
After fastening, withdraw the stopped tool and inspect the joint with the task light rather than judging it only through the driver’s narrow beam. Check the fitting’s position, the recess and the surrounding finish. A shadow can conceal a lifted edge or a scratch that becomes obvious once the driver is removed.
If a built-in light fails, do not open the housing or continue an unsafe setup on the assumption that the motor still works. Arrange suitable external lighting and resolve any tool fault through the proper service route. Good illumination supports a clear, controlled fastening; it should never become the reason to activate a bit before you know where it belongs.
Models referenced