
Indicator state does not replace a cold battery procedure
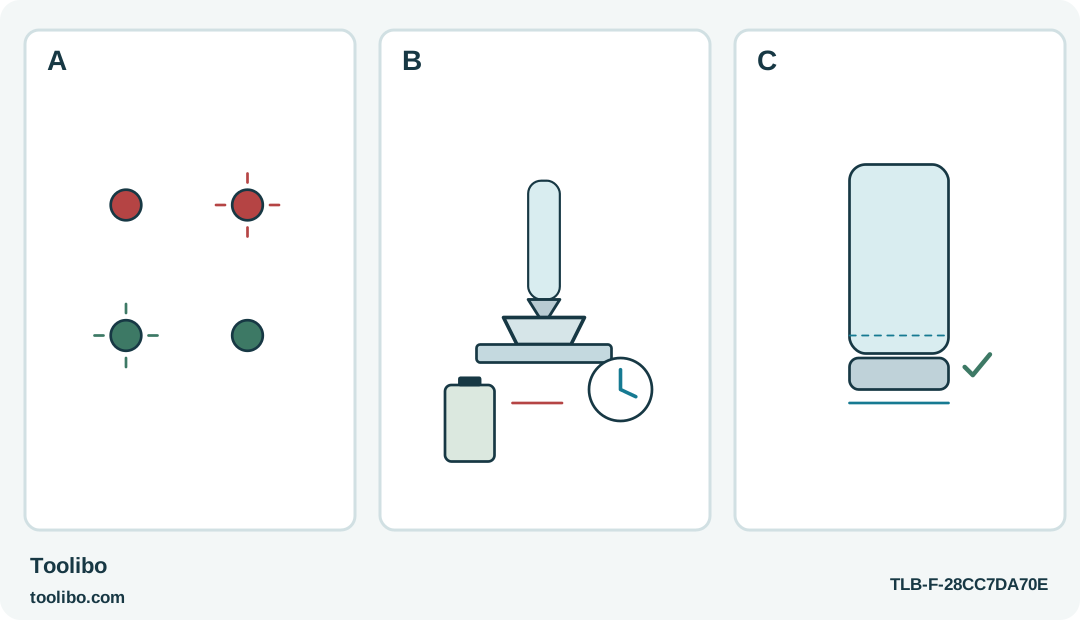
Distinct indicator glyphs, a cooling stand with separate battery and a square exterior cover alignment show the external battery checks.
A
Interpret low-battery red separately from flashing heating green and steady ready green; indicators do not diagnose an internal component.
B
Turn off and cool completely in the stand before removing the specified battery. Charge it using its own approved instructions.
C
Start the threaded cover squarely and secure it normally. A crooked or damaged cover fails the check; never operate with an unsecured compartment.
Low charge, warm-up and an unsecured cover are distinct conditions rather than one generic no-flow fault.
Separate a battery indication from a glue-flow problem
The Ryobi FVH56 uses a removable battery inside the pen’s threaded compartment, not a battery-powered heating base. A red indication can interrupt a craft session, but it does not authorize opening the pen to inspect wiring. Begin with the externally visible information: the model, the installed battery, the state of the cover and the indicator pattern.
In the FVH56 table, steady red indicates a low battery in the five-to-twenty-five-percent range, while three red flashes indicate the zero-to-five-percent range. Flashing green is heating and steady green is ready. These signals help distinguish the next ordinary action; they do not identify a failed internal component or certify that a particular adhesive bond will succeed.
If green is flashing, allow the heating sequence instead of interpreting the lack of immediate flow as a dead battery. If green is steady, check flow on protected scrap under ordinary dispensing pressure. Never press the side tab harder to use the last energy from a low battery or to diagnose why a stick will not feed.
Make the pen cold before changing the battery
Plan a battery change as the end of a hot-tool session. Turn the pen off and place it in its intended stand, with the nozzle and any drips clear of surrounding objects. Wait until the pen has cooled completely before battery removal. Keep the partially completed craft supported separately so nobody needs to move the cooling tool to retrieve it.
- Confirm the power is off and the assembly is fully cool.
- Unscrew the battery-compartment cover as shown for the FVH56, without using pliers or forcing it.
- Remove the battery and check the accessible compartment and cover for obvious damage or contamination.
- Set a damaged, leaking or otherwise abnormal battery aside from use and follow its manufacturer’s safety and service guidance.
The removable cover is an intended user access point; the rest of the pen housing is not. Do not remove screws, probe contact openings or try to flatten a damaged contact. If the cover is cracked, the threads are damaged or the battery cannot be removed normally, stop and seek appropriate service rather than increasing force.
Charge and reinstall the specified battery
Use the battery’s own charging instructions and approved charging equipment. The USB Lithium branding describes the system; it is not a reason to plug a cable into an assumed port on the pen or improvise an adapter. Keep charging separate from the hot-glue bench, where adhesive drips and loose scraps can contaminate connectors.
Allow the battery to meet its specified charging conditions. Do not attempt to warm a cold battery with the glue pen, cool a hot battery with water or bypass a charging warning. If the battery instructions identify a fault indication, follow that route rather than repeatedly reconnecting it until a light changes.
Reinstall only the battery specified for this pen. The manual’s illustrated sequence places the battery in the compartment, then presses the cover into engagement with the threads and secures it. Start the cover squarely and turn it normally. A cover that sits crooked or will not secure without force is a failed check, not a cosmetic issue. Do not operate with the battery compartment unsecured.
Before restarting, check that the compatible 0.28 inch (7.11 mm) stick is correctly loaded with power off. The broader diameter choices of another Ryobi gun do not apply to the FVH56. A correct battery cannot make an incompatible adhesive or stick size safe to use.
Restart on scrap, or stop at the service boundary
Return the pen and its unpowered stand to the protected bench. Turn the pen on using the specified three-second hold, allow flashing green to change to steady green and make a small supported scrap application. This is a restart check, not a demand to continue the interrupted joint. Glue already applied before the battery change may have cooled and must not be treated as fresh adhesive.
If a properly charged specified battery, a secured cover and the normal operating sequence do not produce expected behavior, turn the pen off. An unusual smell, damaged housing, abnormal heat away from the hot end or persistent failure to operate calls for service. Do not substitute a higher-voltage battery, bridge terminals or open the tool to find a loose wire.
Record the exact indicator pattern and when it appeared—during startup, heating or dispensing. That observation is useful for support without pretending to identify the cause. Finish by cooling the pen fully before any further battery handling or storage; the manual’s thirty-minute minimum before storage does not replace the requirement for complete cooling. A successful battery check ends with normal external operation or a clear decision not to use the tool.
Models referenced