
Keep colour transitions off the finished motif
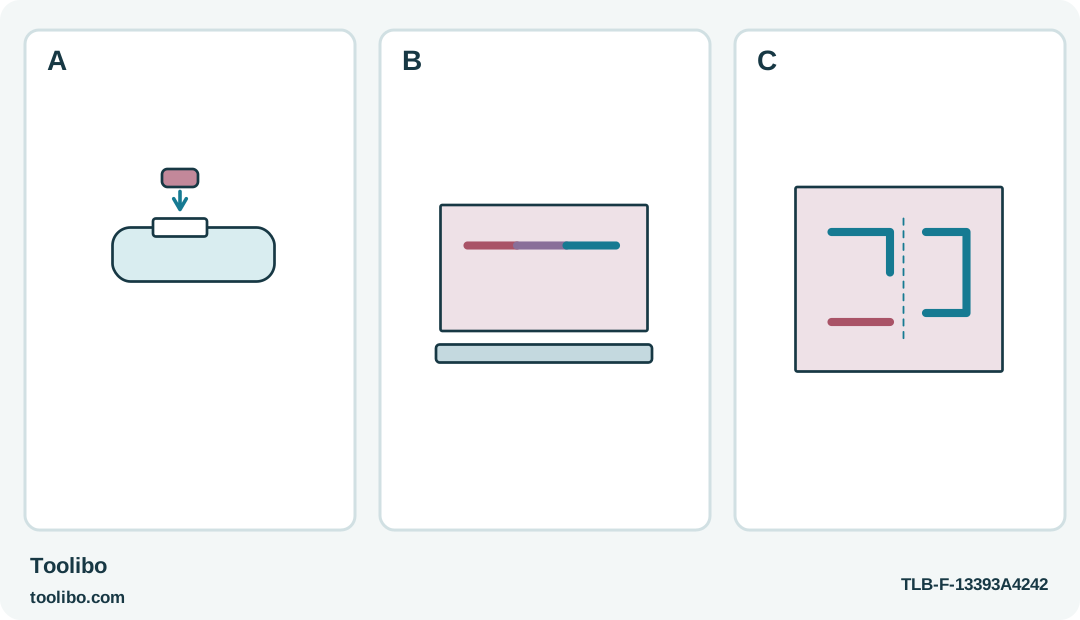
A short stick above a top compartment, three transition colours on scrap and separated final strokes distinguish loading from a clean colour change.
A
Load the specified short Gluey stick through the top compartment using the normal slider procedure; not a rear-feed long stick.
B
Keep the old-to-new colour transition on protected scrap. Judge actual output, not a fixed number of feed movements.
C
Rehearse separated short strokes and stop feeding before lifting; let each ridge cool before working close to it.
The newly loaded colour reaches the project only after the transition has been checked on separate scrap.
Plan the colours before heating
A clean stripe of blue can turn muddy if it begins with the red adhesive left inside the pen. Changing the stick does not instantly change the material at the nozzle. For a small card motif, decide the colour order before switching on the Gluey and keep a separate, protected scrap area for each transition. This is more reliable than trying to hide an unexpected mixed patch in the finished design.
Use the identified Bosch Gluey with its recommended short sticks. Its top compartment takes the specified 7 mm diameter, 20 mm long pieces; it is not the long rear-feed system used by the GluePen. Keep the labelled packets beside the bench so that clear, coloured and glitter stock cannot become an anonymous pile. Use only the recommended low-temperature adhesive, not a high-temperature stick cut into a convenient-looking length.
Choose a supported indoor decoration that does not carry weight, touch food or need to resist moisture. Keep children and pets away from the hot work. A scrap trial must establish that the actual card and finish tolerate the adhesive without curling, staining or separating.
Rehearse the motif with a cold pen
Draw a simple guide on spare card and practise the path without feeding glue. Divide a large shape into short strokes that can be placed comfortably. Decide which strokes may overlap and which need a clear gap. A slightly simpler design is usually preferable to a complicated line that requires stopping halfway through a tight corner.
Keep the card flat on a heat-resistant silicone surface. Do not hold thin paper behind the hot application point; heat or adhesive can pass through it. Place the purge scrap where it can be reached without passing the nozzle over the finished motif. Give the pen its own safe resting space, clear of loose paper and the edge of the bench.
Arrange the next stick and the current packet so you can identify them without leaning over the hot end. Do not use the pen’s nozzle as a pointer while deciding which colour comes next. Finish the planning while all materials are still cool.
Load the correct short stick
Retract the slider toward the rear to uncover the top glue-stick compartment. Place the correct short stick into that compartment, following the illustrated loading direction. The next movement of the slider feeds toward the nozzle; it is not a trigger to be squeezed from below. Keep fingers away from the nozzle and the hot forward body throughout loading.
Switch the pen on and wait for its light-up ring to change from slow flashing to a continuous light. Feed with moderate slider pressure. If the slider resists, do not push harder to make a colour change happen sooner. Check readiness, correct consumable identity and battery condition before continuing.
When the slider reaches its forward end, the stick has been used up and another can be loaded. Never pull the remaining adhesive backwards to clear the chamber. The old material must leave in the normal forward direction, onto the protected scrap rather than the decoration.
Keep the transition on the sample
Make a short test line on the purge scrap, release the feed and let the material settle. Inspect the colour before moving to the final card. A streaked or intermediate colour means that the old material is still coming through. Continue only with controlled short applications; do not create an oversized hot pile that is difficult to handle or cool.
Once the output is suitable, begin the planned stroke on the decoration. Keep the nozzle and the support steady, and stop feeding just before lifting away at the end of the stroke. Do not drag a still-feeding pen across a gap that should remain empty. Allow the raised line to cool before working close enough that another movement could smear it.
Test each new transition separately. A light colour following a dark one may reveal contamination more clearly, but there is no dependable universal number of slider movements that clears every change. Judge the actual output on scrap, not the appearance of the newly loaded stick.
Inspect the result and preserve the colour record
After cooling, examine the motif in its intended lighting. Check the gaps, edges and starting points, not just the middle of each line. If an area is visibly muddy, redesign that part or make a new card rather than reheating the finished decoration with an improvised tool.
Switch the Gluey off deliberately and let it cool completely before packing it away. Keep remaining sticks in their labelled packets and note which colour was last used. That small record makes the next session easier: the first test can anticipate the material already inside instead of treating its appearance as a fault.
Models referenced