
Compare PBLJS01 and PSBJS01 switch and dust workflows · Diagram
A bow-handle outline highlights its trigger; a barrel outline has two separate forward arrows for the start and stop actions.
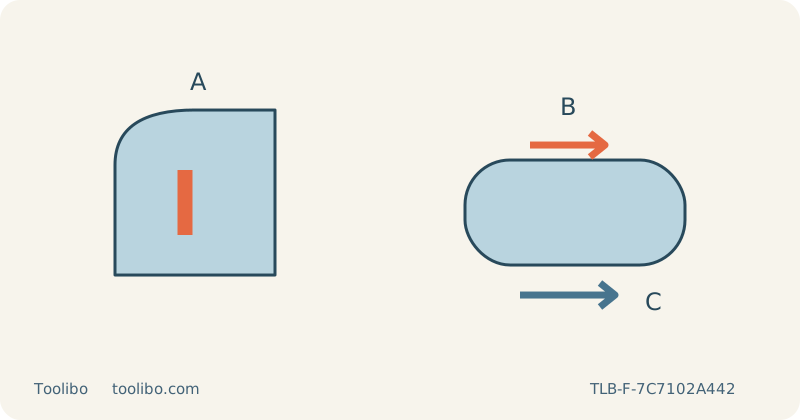
A
PBLJS01: learn trigger and lock-on
B
PSBJS01: push forward to start
C
PSBJS01: push forward again to stop
Compare exact stopping routines, blade retention and hose handling rather than untested performance rankings.
Compare the exact two machines
The US RYOBI PBLJS01 and PSBJS01 use different hand positions and control routines. Their bare-tool retail listings are PBLJS01B and PSBJS01B; the final B identifies the listing rather than a separate operating procedure in these guides. Compare the machine nameplate with the correct manual before carrying habits from one to the other. Shared battery branding does not make switches, dust controls or accessories interchangeable.
This comparison is based on checked manufacturer product information and manufacturer-written manuals, not a hands-on contest. It does not rank cutting speed, vibration or long-term durability. A useful household decision is which verified control routine and support arrangement you can operate predictably on the intended loose woodwork. Neither grip shape is a reason to use the saw upside down or in an improvised stationary mount.
Rehearse how each tool actually stops
The PBLJS01 has a trigger, a lock-on function and a separate speed control. Learn the trigger and lock-on release sequence from its manual while the battery is removed. Do not assume that every trigger gives the same speed response or that releasing a trigger always stops a tool whose lock-on is engaged. Position your hand so that the intended stopping action remains accessible throughout the route.
The PSBJS01 has a spring-return side switch. Returning to its resting position does not mean that the motor has stopped: after starting, the saw continues running until the switch is pushed forward again as specified. Rehearse that distinction with power isolated. Its A mode starts at a reduced no-load rate and accelerates when cutting; a change in speed is not permission to ignore the on/off state.
Match blade retention before evaluating grip
Both examples require a suitable T-shank blade rather than assuming any blade in a mixed household pack will fit. Switch off and remove the battery before installation or base changes. Seat the compatible blade fully according to the exact clamp procedure, centre the blade back in the roller groove and check retention. A comfortable grip cannot compensate for a blade that is incompletely inserted or unsupported.
Secure the base for a straightforward zero-bevel sample before exploring project curves. Check that the guard is intact and the blade remains long enough for the material throughout its stroke. If a blade or base cannot be secured, stop and arrange service. Do not compare the tools by forcing a poor setup through scrap merely because that scrap is expendable.
Include extraction and reach in the comparison
The PSBJS01 provides distinct blower and vacuum arrangements. Select the specified vacuum mode when using its dust attachment, with the battery removed for attachment and mode changes. Route the hose behind the saw and check that it does not pull on the grip or obstruct the stopping switch. Evaluate the PBLJS01’s actual permitted dust arrangement from its own manual rather than transferring the barrel-grip selector routine to it.
Draw the intended route on matching scrap and rehearse it with power isolated. Check wrist position, visibility, reach and where the base will remain supported. A longer curve may be better divided into separate approaches with full stops and re-clamping than completed by stretching. Move the loose workpiece to a comfortable orientation; do not choose a grip by assuming you will learn to reach awkward controls during a live cut.
Make a controlled choice from comparable samples
Clamp each sample on a stable bench, support the waste independently and leave the full blade stroke clear underneath. Use the same known, uncoated wood thickness and a blade appropriate to each tool and the task. Wear eye and hearing protection and suitable respiratory protection, with compatible dust extraction and ventilation. Support the base, start with the blade clear and feed only after the operating speed is established.
Stop fully before withdrawing, setting down or inspecting, and remove the battery before adjustments. Compare whether you could keep the base flat, follow the route and execute the correct stop without changing to an insecure grip. Also inspect the bottom of the cut, not merely the visible pencil line. Choose according to these task-specific requirements and existing verified battery compatibility, without turning a single sample into an unsupported claim that one model is universally more accurate or safer.
Models referenced