
Choose for the stage, not a fixed two-tool sequence
The coarse surface and shallow marks represent different starting tasks, not measured speed or a requirement to use both machines.
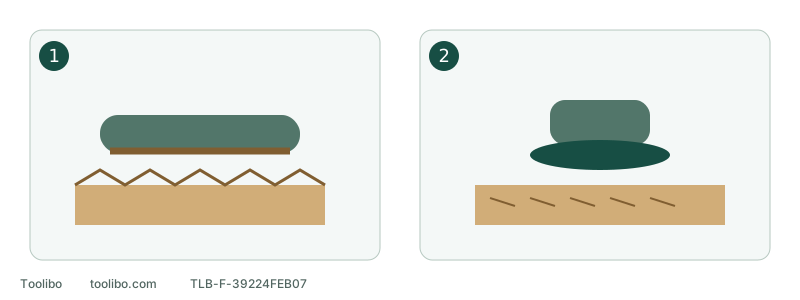
1. Defined heavier removal
Check known solid wood, allowance and geometry before choosing a belt.
2. Scratch refinement
A nearly correct shape may need refinement without another coarse stage.
The coarse surface and shallow marks represent different starting tasks, not measured speed or a requirement to use both machines.
Turn “make it smooth” into a specific job
If you only need to remove shallow sanding marks, there is no reason to create coarser belt marks first. Conversely, a thick solid-wood surface needing substantial removal is not automatically an appropriate endless task for a random-orbit machine simply because it suits finer work.
Record material, removal allowance, planes and edges to retain and the next process. Twisted panels, loose joints, thin veneer and unknown paint are not solved by selecting a more powerful sander. Establish material, safety or woodworking repair requirements first.
Use two exact models to understand the systems
Makita 9403 and BO5041 illustrate two routes here, not a measured speed ranking. 9403 uses a 4 × 24-inch continuous belt with a published linear speed of 1,640 ft/min. BO5041 uses a five-inch round disc and a published adjustable 4,000–12,000 OPM range.
One number measures linear belt travel, the other orbital frequency. Putting 1,640 beside 12,000 does not identify a winner. Consumables, contact shape, path control and stages differ, so return to the workpiece.
Swipe or scroll horizontally to see all columns.
| Dimension | 9403 belt route | BO5041 random-orbit route |
|---|---|---|
| Starting task | Identified heavier surface removal on securely supported solid wood | Refining existing scratches, evening a surface and finer preparation |
| Contact and shape | Continuous belt over a flat contact region, requiring control against dwell and imbalance | Round pad for general refinement, not direct access into sharp inside corners |
| Shape risk | Insufficient allowance or local dwell can remove material that should remain | Tilting, pressing or dwelling can also create hollows; not immune to over-sanding |
| Consumables | Correct width, whole-loop length, direction and seam condition | Correct diameter, hook-and-loop attachment and actual extraction openings |
| Preparation | Complete compatible dust, cord and workholding arrangement | Suitable extraction and stable workholding still required |
| Stage endpoint | Planned removal reached: move to an appropriate refinement process | Surface meets the next process, not merely every grit being used |
These are task-matching advantages, not guarantees that belts are faster in every material or discs always leave a better finish. Abrasive, operation and starting condition still matter.
Three practical situations
First: a thick solid-wood broad surface has identified superficial machining marks requiring appreciable rough preparation, sufficient allowance and no structural or overall distortion problem. A belt route may fit, but define the removal endpoint and inspection locations first. Establishing a precise plane may still call for suitable planing or flattening beforehand.
Second: the surface already approaches the intended shape and chiefly needs prior coarse scratches refined. Random orbit better matches this stage: use suitable abrasive as needed while retaining edges. Do not belt-sand again just to complete a ritual, or jump to exceptionally fine grit expecting deep marks to disappear automatically.
Third: thin veneer, unknown remaining thickness or unidentified old coatings. Neither tool directly enters ordinary removal. Switching to random orbit does not remove sand-through or hazardous-dust risk. Establish material, viable method and controls first, involving a qualified person where needed.
Judge handover from the work, not a stopwatch
Before starting, choose repeatable inspection points and a target, recording original planes, edges and defects. The belt stage should not try to eliminate every later fine scratch in one operation. Once planned removal is reached, stop by the model’s instructions, wait for complete stopping and isolate power. Clear the surface and inspect the same points and lighting for new hollows or edge changes.
Only if shape remains acceptable select the next abrasive and tool for the actual scratch pattern. Deep marks remaining mean reassess the stage, not add pressure. Every tool or abrasive change requires isolated fitting and extraction preparation, then OFF confirmation before power restoration and the exact model’s start/stop sequence. Do not transfer a disc sander’s starting method to a belt machine.
There is no universal “two minutes of belt, one minute of disc” recipe. Without adequate allowance or reliable inspection, stopping is more sensible than completing timed stages.
With a one-tool budget, prioritize your common work
If you mainly refine already fairly flat furniture parts and prepare ordinary surfaces, prioritize a random-orbit tool with complete abrasive and extraction costs. For occasional heavy removal, use appropriate prior processing or outside help rather than indefinitely substituting a finishing tool. Frequent rough preparation of known thick solid-wood planes gives a stronger reason to include a belt sander, with a plan for later refinement.
Budget for the corresponding belts or discs, extraction connections, work restraint and suitable power, not just the bare tool. If both jobs are rare, hand work, borrowing or someone with appropriate equipment may suit better.
Your choice should answer which stage the tool solves and what condition ends it. Those answers are more reliable than the largest specification number or assuming aggression always saves time.
Models referenced