
Pair the selected reference with the contact
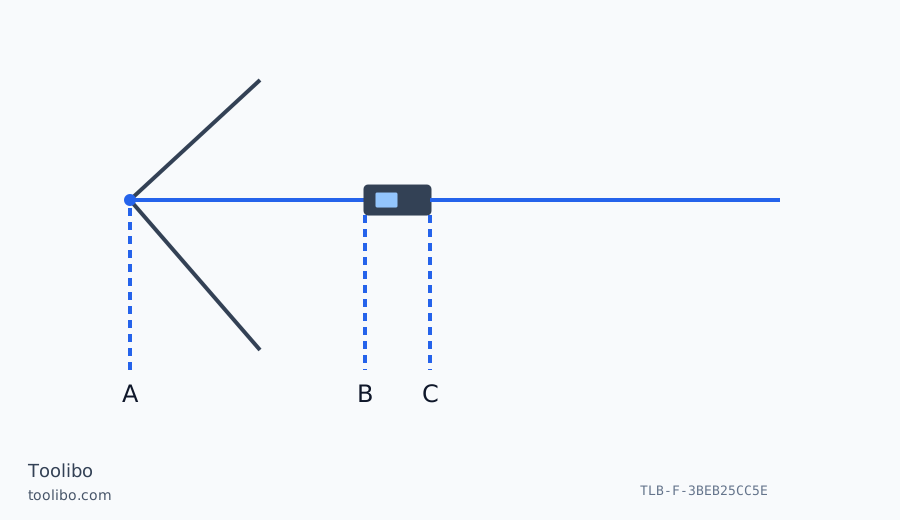
An extended pin, rear housing edge and front housing edge form three distinct positions beside a corner profile.
A
Identify the pin contact at the corner.
B
The rear housing edge is a different reference.
C
The front edge is another documented reference choice.
The TLM165 pin reference is a selected setup; do not assume another model’s automatic endpiece behaviour.
A folding toe does not imply an automatic setting
This guide concerns the TLM165 STHT1-77139 identified in the historical Asia catalogue and its matched GB English operating instructions. The reference and units control is separate from the function control. Inspect the reference before beginning a new series, especially after moving from a flat wall into a corner. The manual distinguishes front, rear and endpiece-pin references. Do not assume the pin behaves like another manufacturer’s automatically detected endpiece.
Match the selected symbol to the actual contact point. In an internal corner, position the intended reference so it genuinely reaches that corner rather than rocking on trim. Keep the beam clear of the adjacent wall. Where a rounded edge prevents repeatable placement, choose an accessible alternative baseline and describe it. Calling a curved finish a sharp corner on paper does not make the contact reproducible.
Use memory only alongside named dimensions
The matched manual documents five-result memory. A recalled value is useful only when you know whether it represents a width, a diagonal or a calculated result. Label the plan before measuring and write each value against its label promptly. An unexplained final total cannot show why a recess appears wider than expected. Short memory is a convenience during a session, not a replacement for identifying the surfaces measured.
For a fit assessment, check the opening at different heights and depths. Diagonals can reveal a difference between two corner-to-corner paths, but that observation alone does not prove that the opening is rectangular. Projecting hinges, pipes and trim need separate notes and often short direct measurements. Keep those local obstructions distinct from the long span used to describe the general opening.
Stop before cutting from an uncertain number
Before fabrication, verify critical dimensions by another suitable method. If changing the reference creates an unexplained jump, repeat a familiar simple span with the correct setup. Do not rescue an entire survey by adding the same guessed correction to every value. Different readings may have used different contact points, functions or targets, so an apparently tidy adjustment can preserve hidden errors.
Inspect the folding pin externally and use it only in the positions covered by the instructions. A loose, bent or damaged component needs service advice. Do not dismantle the instrument or alter its optics. Keep the beam away from eyes, people and optical instruments. A measurement does not establish safe structural clearance, and a plausible number is not sufficient evidence for an irreversible cut.
Rehearse the change from a wall to a recess
Start with an uncomplicated wall-to-wall distance that you can identify and check. Place the rear of the instrument firmly against the starting wall and confirm that the selected reference corresponds to that placement. Record the intended endpoints. This gives you a clear example of a normal setup before moving to a more awkward position; it is not a calibration certificate for the instrument.
Now consider the recess. Decide whether the rear housing can reach the required starting point. If a projection prevents that contact, inspect whether the documented pin arrangement can reach it without being forced. Select the corresponding reference using the matched instructions and confirm the display. The mechanical act of unfolding the pin is not a substitute for choosing the correct reference on this model.
Look at the contact from a safe position that does not put your eyes in the beam path. The pin should meet the intended starting surface while the housing remains stable. If the body rocks, the beam brushes a neighbouring edge, or the pin stops on rounded plaster, reposition or use another suitable measuring method. A corner reading should have a physically understandable start and finish before you accept its numerical value.
After recording that dimension, return to the earlier wall setup. Restore the reference appropriate to the rear contact and check the simple span again. If the result changes unexpectedly, investigate the setup rather than applying the pin’s apparent length as an offset. This return check is particularly useful when several people share the instrument because the previous user’s reference choice may not match your next position.
Transfer each accepted result from temporary memory to its named dimension before moving to another room. If you can no longer identify a recalled value, repeat the measurement. Recovering a number is less important than recovering what that number actually describes.
Models referenced