
Complete replacement, closed exterior
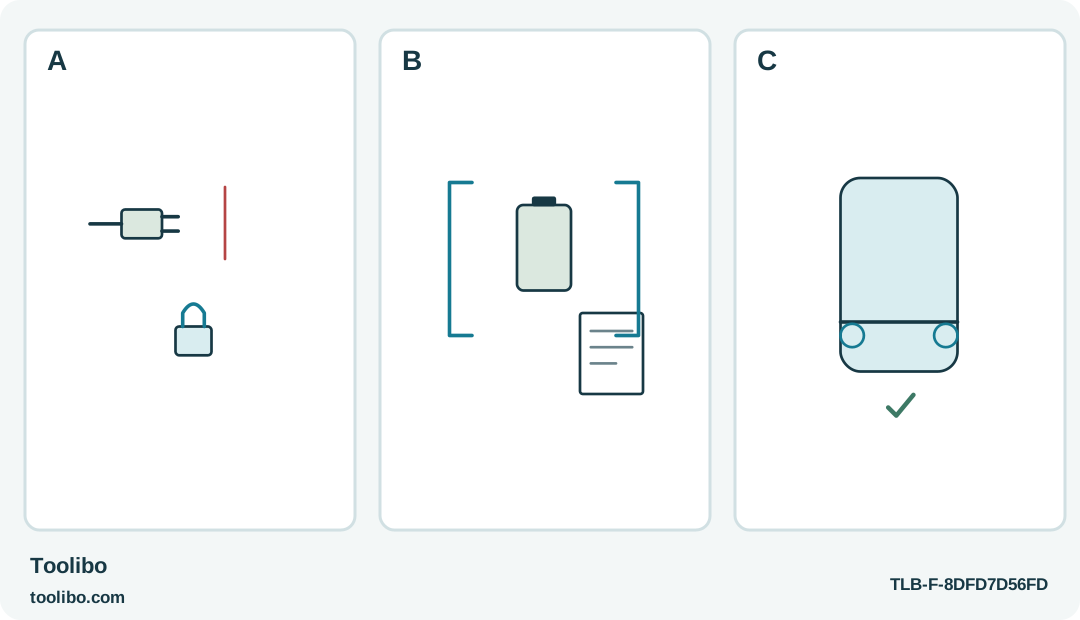
A separated charging plug and lock, a complete-component symbol beside instructions, and two circled exterior cap checks show the replacement boundaries.
A
Disconnect charging and put the normal direction control in middle-lock before the documented procedure.
B
Use only the specified complete replacement battery component; this symbol is not cell or connector geometry.
C
Confirm both cap catches engage as instructed. No teardown sequence or internal arrangement is illustrated.
The replacement boundary is the complete specified battery and the external cap checks, not a route into the cell or its connections.
Identify which IXO is on the bench
Battery advice for an older IXO can be wrong for the Australian-listed IXO 8. This generation has a removable battery-compartment cap and a specified replacement battery. That is a deliberate part of its design, not an invitation to split the main housing or rebuild a battery from loose cells.
Check the actual model and its supplied instructions before buying a replacement. A similar color, a familiar IXO name or a kit with more accessories does not establish battery compatibility. The Australian product identity considered here is 06039G4000; another package number can describe a set rather than a different device.
Keep the purpose of the job narrow. You are deciding whether a complete manufacturer-specified battery can be replaced through the intended compartment. You are not diagnosing cell chemistry, repairing charging electronics or converting the tool to an external power source.
Rule out an ordinary interrupted charge first
A tool that was put away partly charged does not necessarily need a battery. Inspect the outside of the charging cable, connector and tool for damage, contamination or moisture. Use the supply and charging arrangement specified for this exact generation, not a cable chosen because it fitted an older IXO.
Follow the tool’s charging indicators and instructions in a dry, suitable location. Do not judge battery health from one short attempt after storage. Conversely, repeated abnormal heating, a damaged battery, unusual smell or a distorted compartment is a reason to stop using the tool rather than keep charging until something changes.
Write down what happened: whether charging began, which indication appeared and whether the tool ran after the cable was disconnected. That simple record is more useful for a service discussion than a guess that the battery is “dead.” Do not open the tool to confirm the guess.
Keep the compartment procedure separate from cell repair
Before the documented battery-compartment operation, unplug the USB cable and put the direction selector in its middle lock position. Use the exact battery and cap procedure in the IXO 8 instructions. Do not use a screwdriver as a lever against an unexplained seam or force a cap whose release is unclear.
Handle the battery as a complete component. Keep its contacts away from screws, metal scraps and loose bits. A replacement that looks close in size is not enough: the specified Bosch battery, its orientation and the intended connection must all match. Do not modify a contact, add a spacer or substitute a loose cell to make an unsuitable part fit.
The cap has two catches that must engage correctly when it is refitted. Check the complete closure before treating the tool as ready. A gap, a cap that rocks or a catch that will not engage is not something to hide with tape. Stop and obtain the correct part or service advice.
Make the first check away from the furniture
After a correct replacement and any required charge, disconnect the charging cable. Check that the selector and trigger move normally and that the cap remains secure when you hold the tool in the ordinary working position. Keep the bit clear of objects during any brief no-load function check.
For a real fastening trial, choose a supported non-electrical sample with the right screw and bit. Start with a familiar light task rather than using a difficult screw as a battery test. A powered driver can damage a recess long before it gives you useful information about its energy storage.
Watch for changes that concern the assembly you just handled: an insecure cap, interruption when the tool is gently repositioned, abnormal heat or a charging indication that does not agree with the instructions. Stop if any appears. Do not compensate by squeezing the compartment, bending contacts or repeatedly restarting.
Store the replacement information with the tool
Keep the replacement part identification and the relevant IXO 8 instructions together. If several generations are in the same cupboard, label their storage spaces clearly so that a family member does not transfer an older cable, battery procedure or accessory assumption to this one.
Send an exhausted or damaged battery through the appropriate collection route rather than putting it among household metal scraps. Keep it away from loose conductive objects while awaiting disposal, following the manufacturer’s handling guidance. Do not remove cell coverings or dismantle the battery to make it smaller.
The useful ownership advantage of this design is a defined replacement boundary. Staying inside that boundary preserves the distinction between replacing a specified consumable component and attempting an electrical repair that needs qualified service.
Models referenced