
Different attachment functions
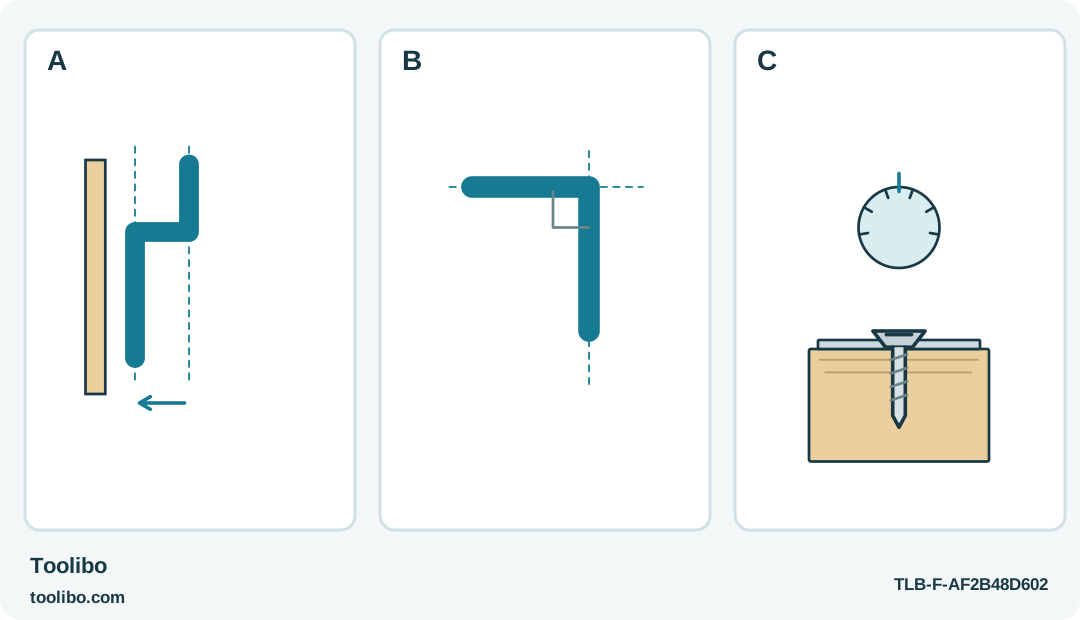
A parallel offset beside a wall, a perpendicular approach, and a separate adjustment ring above a joint distinguish three attachment functions.
A
An offset attachment moves the working line parallel to the original line for edge clearance.
B
An angle attachment changes the approach direction; check exact compatibility, not an assumed stack of adapters.
C
The optional torque attachment controls tightening separately; the bare IXO 7 does not acquire a built-in clutch.
Parallel offset, a changed drive direction and torque adjustment answer three different problems; the attachment should solve the actual obstacle at the screw.
Look at the screw, not just the empty space
A screw beside a cabinet wall can be visible yet impossible to approach squarely with the screwdriver body. Another screw may face sideways inside an open compartment. Those are different access problems, and buying an attachment simply described as “for corners” can leave you with the wrong solution.
For the UAE-listed Bosch IXO 7, first place the switched-off, center-locked tool near the intended screw without forcing it into the furniture. Imagine a straight line extending from the screw recess. The bit needs to lie on that line. If the body collides with an adjacent wall while the bit would otherwise point correctly, you need lateral clearance. If your hand and tool must approach from a different direction, you need a change in driving direction.
Do this assessment on a supported, accessible furniture part. Do not improvise a powered approach to hidden wiring, an unstable cabinet or a fitting that supports someone’s weight. Moving a removable panel onto a bench may solve the problem more cleanly than any adapter.
Separate the three useful functions
The IXO off-set angle adapter is intended for screws close to an edge. Think of it as moving the bit’s working line away from the bulky center of the tool. You still have to align the bit with the screw; offset does not mean that the bit can enter the recess diagonally.
The angle screw adapter addresses hard-to-reach locations by changing the relationship between the tool body and the driving direction. It can be useful when the straight body will not fit behind a screw. The adapter itself takes up space, however, so check clearance for its head and for your hand rather than comparing body length alone.
The torque setting adapter answers a third question: how to limit tightening. Its numbered ring provides ten stages. That adjustment belongs to the optional adapter, not to a hidden clutch inside the bare IXO 7. Do not describe an access attachment as a torque limiter, or assume that every attachment can be combined with another.
Fit only the attachment that solves the job
Disconnect charging equipment and set the rotational selector to its middle lock position before handling the bit or attachment. Identify the actual compatible Bosch attachment and follow its fitting instructions. The normal worklight cover is removed for the relevant adapter connection; it must be restored when that adapter is removed.
Keep loose screws and small fittings in a tray while changing the setup. An attachment should engage by its intended connection, not by being driven into place with the motor. If it will not seat or release as described, stop and inspect the outside connection rather than using pliers on the ring or opening the housing.
Once fitted, rehearse the approach with the motor off. Confirm that the adapter clears the furniture all the way to the final screw-head position. A screw that starts in open space may finish beside a lip that blocks the attachment, leaving you unable to complete or remove the tool cleanly.
Try a controlled fastening before the finished corner
Use the specified screw and furniture instructions to decide the required finished position. Where a matching spare screw and suitable scrap are available, test the setup there first. If using the torque adapter, begin conservatively and adjust only after observing the actual result. The ring is a control to establish through a trial, not a calibrated value that automatically matches another screwdriver.
Start the screw squarely and keep the bit fully engaged. Arrange the work so you can release the trigger promptly without losing your grip. Do not push the attachment sideways to compensate for poor clearance: that loads the screw recess and the tool connection while making the result harder to judge.
Stop if the bit climbs out, the adapter shifts, the furniture moves or the screw meets unexpected resistance. Remove power from the action before checking the cause. A hand screwdriver or a different assembly order is preferable to repeatedly driving at an angle.
Check the joint and return to a complete tool
Inspect the fitting after tightening. The screw head should have reached the position required by the furniture design without crushing a surface or leaving the fitting loose. Confirm that a door, drawer or removable panel still moves as intended; successful access is not the same as a correct assembly.
When finished, center-lock the IXO, remove the adapter using its release arrangement and replace the worklight cover. Store the adapter with its instructions and the bits that actually fitted it. This keeps the next job from beginning with a missing cover, an unidentified accessory or an assumption that all small attachments perform the same task.
Models referenced