
Match the charger before connecting
A tool identity record and charger, crossed connector substitution, and separated disconnection arrows explain charger matching.
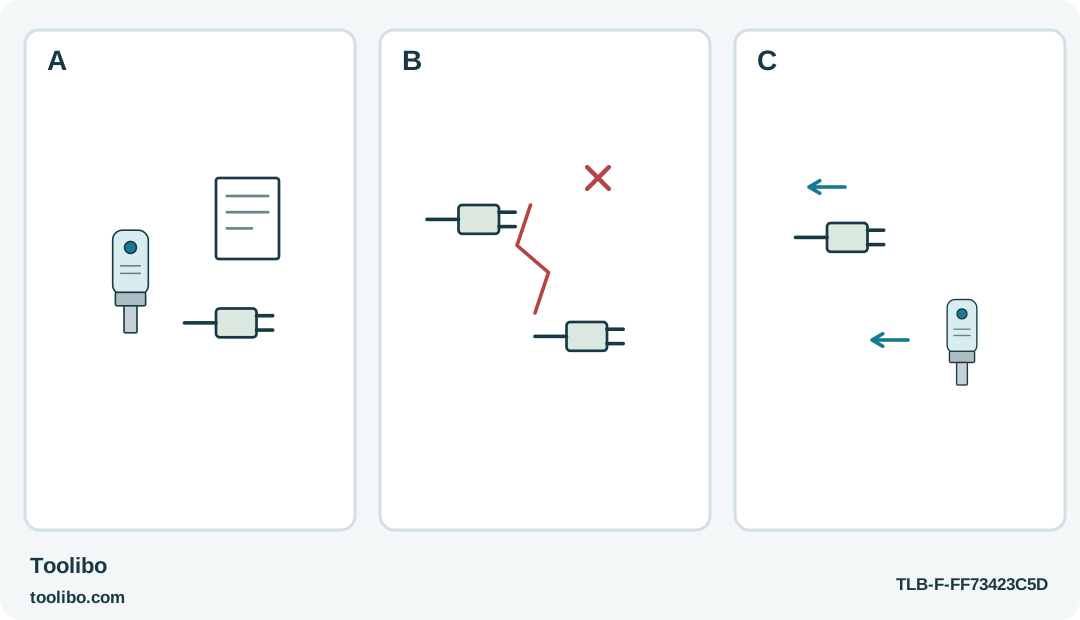
A
Identify the BDCS20 and its supplied or exact approved charging equipment together.
B
A similar connector is not evidence of compatibility; do not borrow USB specifications or guessed charging times.
C
After charging, unplug the wall supply first, then the lead from the tool, following its instructions.
The charger belongs to an identified tool system; connector resemblance and a guessed waiting time are not enough to establish a safe charging routine.
Start with the equipment you actually have
A BDCS20 found in a cupboard may be separated from its charging equipment. The tempting shortcut is to try a plug from another small appliance because it enters the socket. Do not do that. Mechanical fit does not establish the correct electrical characteristics or the manufacturer’s approval for this screwdriver.
Place the tool, any candidate charging equipment and their labels on a dry, clear bench. Identify the BDCS20 body and its associated product information; the US BDCS20C listing describes the relevant package, not permission to use any charger marked with a similar voltage.
If the equipment cannot be positively matched through the exact supplied instructions or manufacturer support, leave it disconnected. A photograph of the tool label and charger label can help resolve the question without opening either device or trying an uncertain electrical combination.
Inspect before making a connection
Look at the accessible cable, plug, connector and charging socket. Stop if insulation is cut, the cable is crushed, the connector is distorted or the housing is cracked. Do not wrap over damage and treat the resulting assembly as ready for charging.
Check that the tool and equipment are dry and free of obvious contamination. Do not insert a metal object into the socket to scrape it clean or attempt to bend a contact into position. A connector that does not enter normally may be wrong or damaged, and forcing it can turn a simple identification problem into a repair.
Keep loose screws and bits away from the charging area. Choose a location where the lead cannot pull the tool off a surface or be trapped by a drawer. Follow the charging equipment’s own location and supply requirements rather than adapting it with an improvised lead.
Resolve instructions instead of choosing a convenient time
Charging advice should come from the exact tool and charger information that applies to the equipment in front of you. Do not choose a duration from a different BDCS model, a marketplace answer or the shortest number printed on a search result.
If the supplied information gives an unclear first-charge instruction, ask the manufacturer to identify the correct procedure for the model and charger combination. Provide the label details and describe whether this is an initial charge, a routine recharge or a tool returning from long storage. Those are more useful facts than a guess about remaining battery capacity.
Do not keep an uncertain charger connected while waiting for clarification. Nor should you deliberately run a doubtful battery completely flat as a test. The owner-level task is correct identification and normal charging, not measurement of individual cells or adjustment of charging electronics.
Separate charging from a working test
Use only the supplied charger or a replacement positively approved for this exact tool. After charging, unplug the charger from the wall outlet first, then disconnect its lead from the screwdriver before operating it. The BDCS20 is not intended to be used with the charger connected. A cable that happens to remain within reach is not a way to turn it into a corded tool.
For the first working check, keep the tool away from the finished furniture and confirm ordinary switch operation with the appropriate control position. Then use a suitable light fastening trial with a correct bit and supported work. Do not select a rusted or jammed screw as a battery test.
If the motor stalls, release immediately. A stall does not prove a charging failure: the screw, recess, material or alignment may be wrong. Inspect those separately rather than reconnecting the charger after every difficult turn or pulsing the motor against the same obstruction.
Know when the job has become service work
Abnormal heat, smell, leakage, a damaged housing or repeated failure under a suitable light load is a reason to stop using the equipment and obtain the appropriate service guidance. Do not open the tool to inspect the internal battery or transfer disposal-only dismantling instructions into a repair attempt.
Keep a short record of the verified charger identity and the charging behavior you observed. If service is needed, that record helps distinguish uncertain equipment from a tool fault. It also prevents the next person in the household from repeating the same plug-matching experiment.
Store the correct charging equipment with a clear identification for this screwdriver. The useful outcome is not simply that a charging light appeared once. It is that the tool, charger and instructions form a known system that can be used again without guessing.
Models referenced